Think of your website as a busy restaurant. You’ve got plenty of recipes (your tracking tags) and customers waiting to be served (your visitors). But without a head chef to coordinate it all, the kitchen quickly becomes unmanageable. That’s where Google Tag Manager comes in.
GTM – the head chef – decides which recipes to cook, in what order, and how they should be served. That is to say: GTM allows you to run a well-organized website where every tag is fired at the right time, in the right way.
Basically, this tool enables website owners to manage and deploy marketing tags on their website without having to modify the code. Those marketing tags are most commonly used to track:
- Page views.
- Button clicks.
- External links/outbound clicks.
- Conversions, such as in Google Ads.
- How a user scrolls and behaves on a page.
Without GTM, every time you want to add a new tag, you have to ask a developer to change the website’s code. GTM allows you to do it with just a few clicks. Let’s explore Google Tag Manager and how to get it going.
Understanding key concepts: tags, triggers, and variables
When you first open Google Tag Manager, you’ll notice three words coming up again and again: tags, triggers, and variables. These are the three main parts of any tracking setup and once you understand how they work together, GTM will become a lot clearer.
1) Tags: the instructions you want to execute
Tags are a set of instructions for GTM, telling it what information to send and to where. They connect your website to marketing platforms like Google Ads, LinkedIn, or GA4. Common examples include:
- Sending a page view event to Google Analytics 4.
- Firing a conversion tag when a purchase is completed for Google Ads.
Simply put, if GTM is the restaurant kitchen, tags are the recipes you want to cook.
2) Triggers: the rules that decide when tags are fired
Tags don’t just run continuously – they need guidelines, and that’s where triggers come in. A trigger tells GTM when to activate a tag. They prevent you from counting things multiple times by only activating tags at the correct time. Examples include:
- Fire this tag on all page views.
- Fire this tag when someone clicks the “Buy Now” button.
- Fire this tag when a form is successfully submitted.
- Fire this tag when the user scrolls 90% of the page.
In our kitchen analogy, if tags are recipes, triggers are the instructions for when to cook them.
3) Variables: the details tags and triggers need
Suppose you want to know which form was submitted, not just that a form was submitted. That’s where variables come in. They are bits of information GTM uses to make choices or to send information along with a tag, improving your reports and clarifying what specifically happened. Without variables, tags and triggers wouldn’t know what to do. Examples include:
- Page URL (to check in which page exactly the user is on).
- Button ID (to make sure we’re tracking the right button).
- Transaction value (to pass revenue back to GA4 or Google Ads).
To continue the kitchen analogy, variables are the ingredients needed for the recipes to be made.
4) How they all work together
Google Tag Manager’s power comes from how tags, triggers, and variables work together. Here’s a quick recap:
- A tag defines what action to take (e.g.: send a GA4 event called “purchase”).
- A trigger defines when it should happen (e.g.: when the user gets to the order confirmation page).
- A variable provides the details that make it meaningful (e.g.: transaction ID = 12345; value = 89.99; currency = USD).
Basically, you can think of GTM as a system that only works when these three elements connect.
Getting started with GTM: step by step
Now that you know the core concepts, let’s roll up our sleeves and actually set up GTM.
1) Create an account and container
For this first step, do as follows:
- Go to https://tagmanager.google.com/.
- Sign in to your Google account. If you don’t have one yet, create it here: https://myaccount.google.com/.
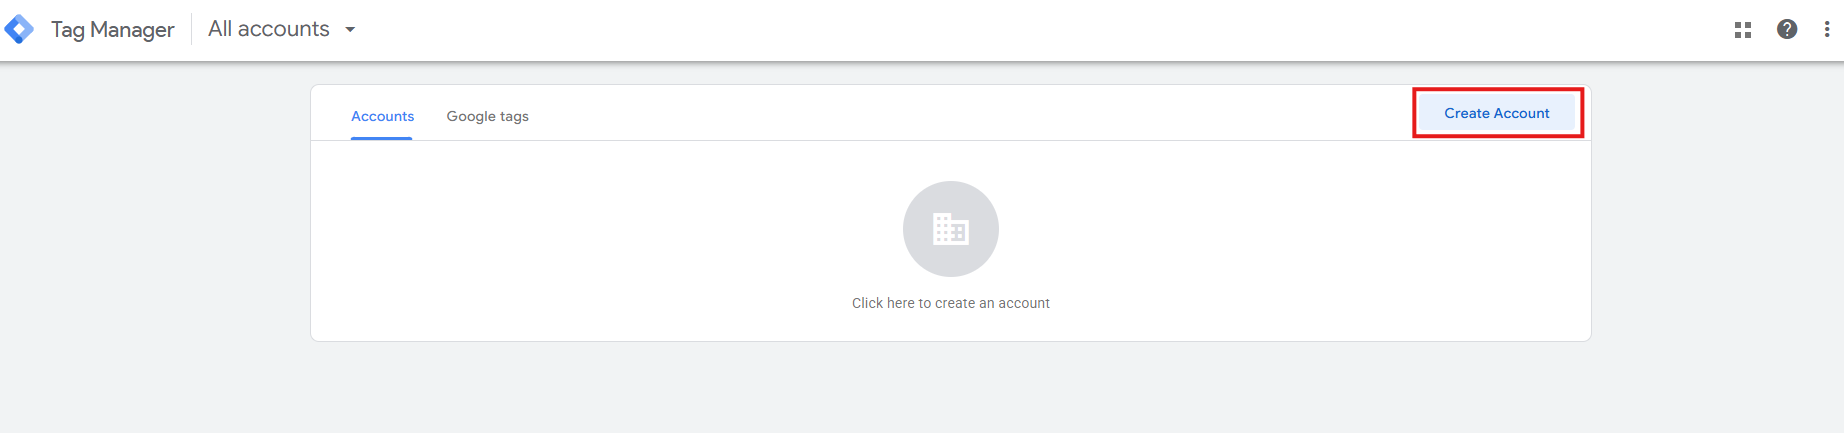
- In GTM, click on Create Account (on the right-hand side of the screen):
-
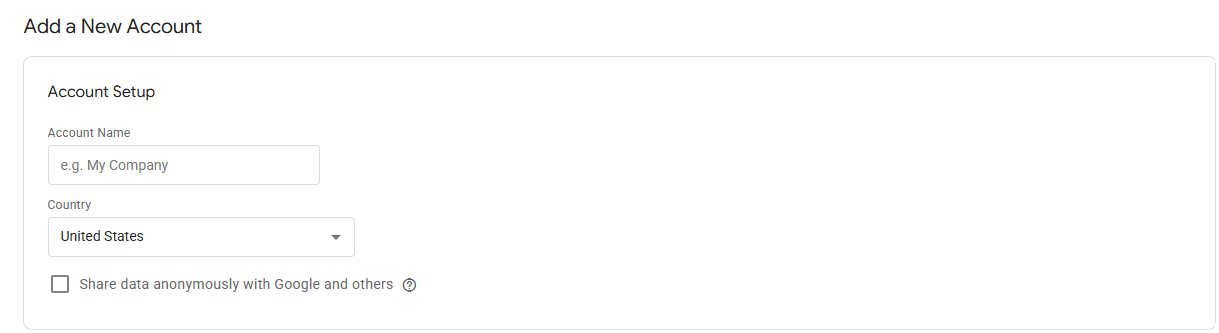
In the Account Setup section:
- Insert the account name.
- Select the country.
-
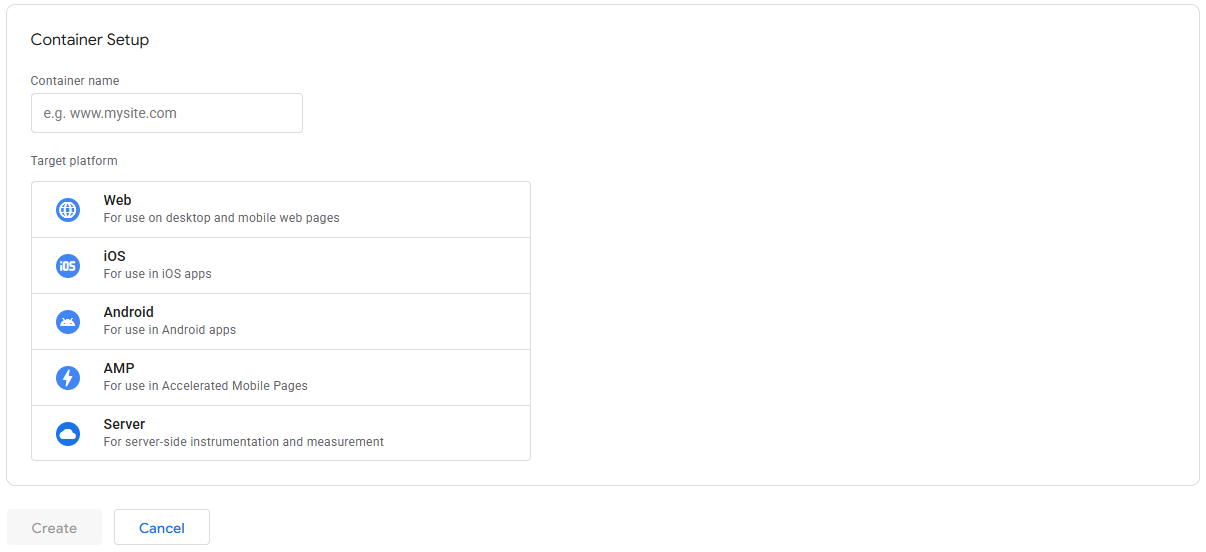
In the Container Setup section:
-
Insert a container name (ideally, if the container is for a website, it should be named after the URL).
-
Select the type of container, among the following options:
- Web (for a website or web app).
- iOS (for an iOS app on Apple devices).
- Android (for an Android app on Android devices).
- AMP (for a website that uses Accelerated Mobile Pages (AMP)).
- Server (for a website that uses server-side Tag Manager).
-
-
In the end, click Create and agree to the Terms of Service.
-
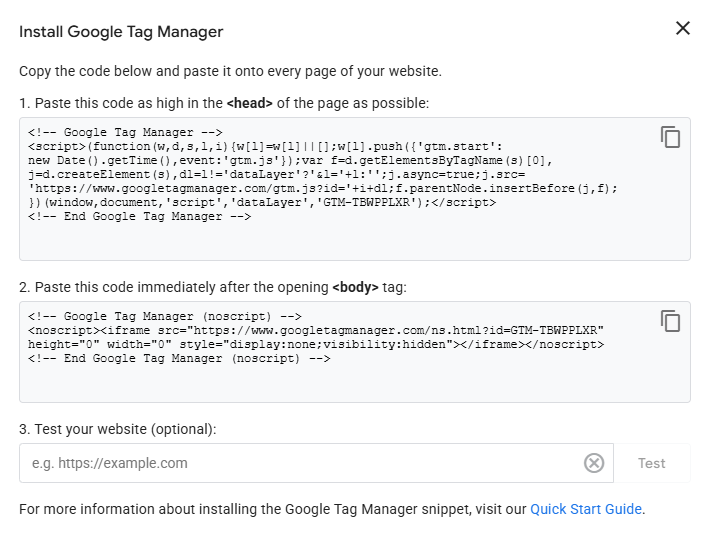
GTM will show you a pop-up window with the code snippets that will be necessary for the process. You can copy them at this stage, or later come back to them.
2) Install a web container
The next step is installing the necessary code snippets for the website’s container. To do that:
- If you’re not already on GTM, go to https://tagmanager.google.com/ and make sure you’re signed in to your Google account.
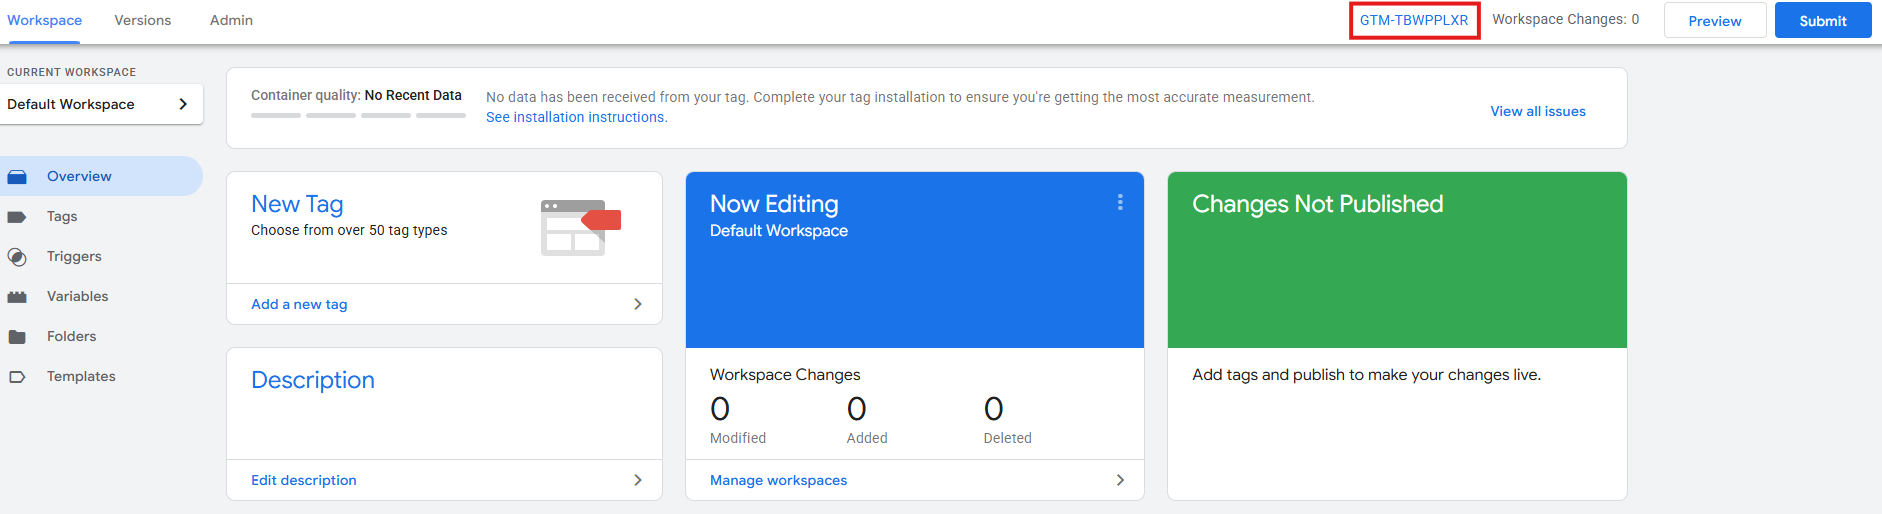
- Go to the GTM container you created and, in the Workspace tab, click on the container ID (it will be something like GTM-XXXXXXXX) on the right-hand size of the screen.
- When the Install Google Tag Manager dialog pops up:
-
If your website relies on a website builder or CMS, follow Google’s instructions for different platforms here: https://support.google.com/tagmanager/answer/12403447.
-
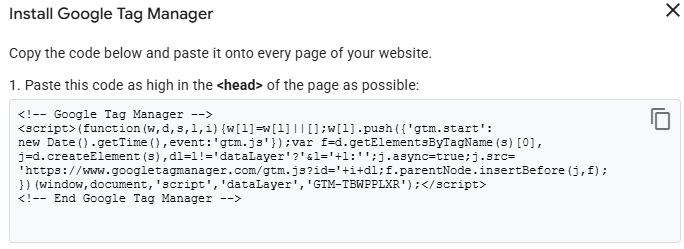
Otherwise, you can paste your Google tag snippet manually into your website builder’s/CMS’s custom HTML field. For that purpose, follow these steps for each page of the website (and don’t panic if this looks technical, just copy and paste. You don’t need to understand every line of the code):
- Copy the first block of code and paste it as high in the
<head>tag as possible.
- Copy the second block of code and paste it immediately after the opening
<body>tag.

- Use the GTM Preview mode to test if the container is firing correctly on your website. For that, enter the website’s link and click Test.

- Click OK.
- Copy the first block of code and paste it as high in the
-
3) Add your first tag
Once your container is installed, the next step is to set up tags – in other words, pieces of code that tell GTM what to send to GA4. Most websites start with a Google Tag, which connects your website to GA4 and ensures data starts flowing into your property. Here’s how to do it:
- If you’re not already on GTM, go to https://tagmanager.google.com/ and make sure you’re signed in to your Google account.
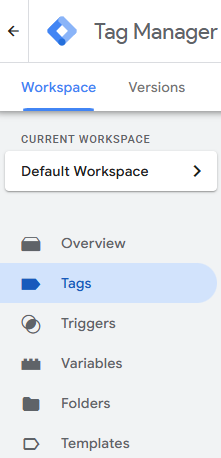
- Open the container and, in the Workspace tab, click Tags.

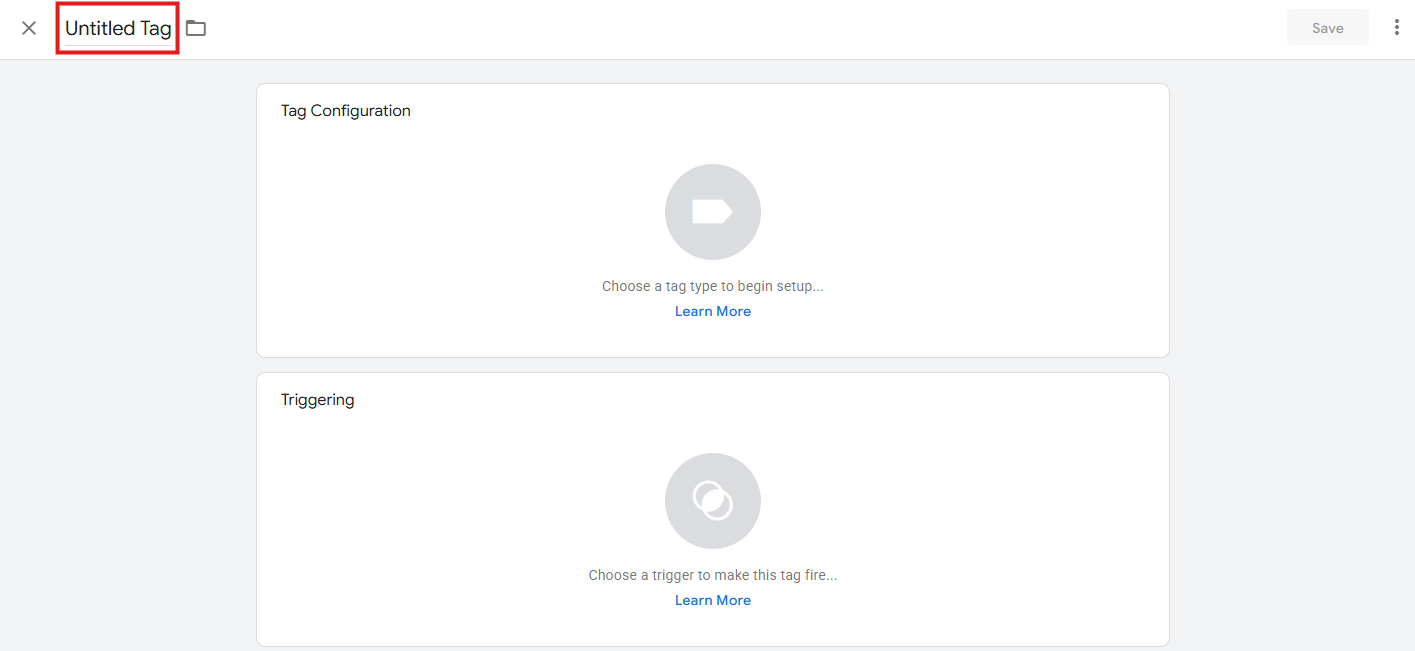
- Click New to create your first tag.
-
In the tag setup panel:
- Name your tag (e.g.: Google Tag).
-
Under Tag Configuration:
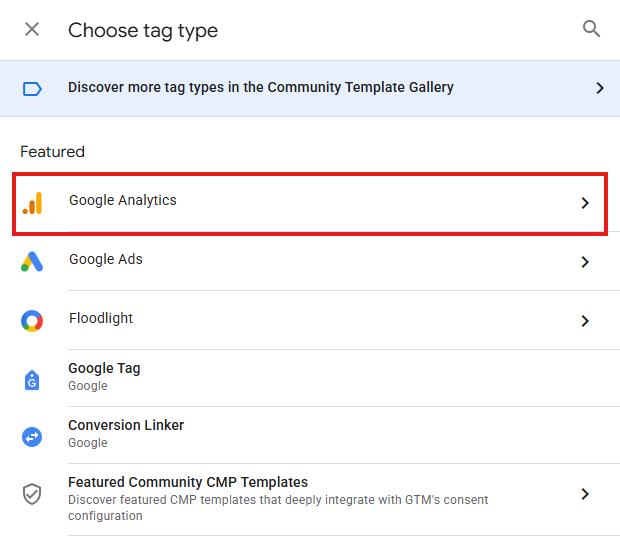
- Click the box to choose a tag type.
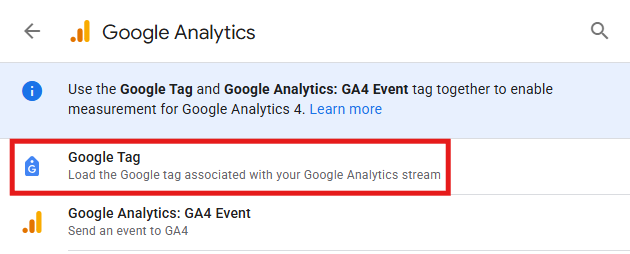
- Select Google Tag.
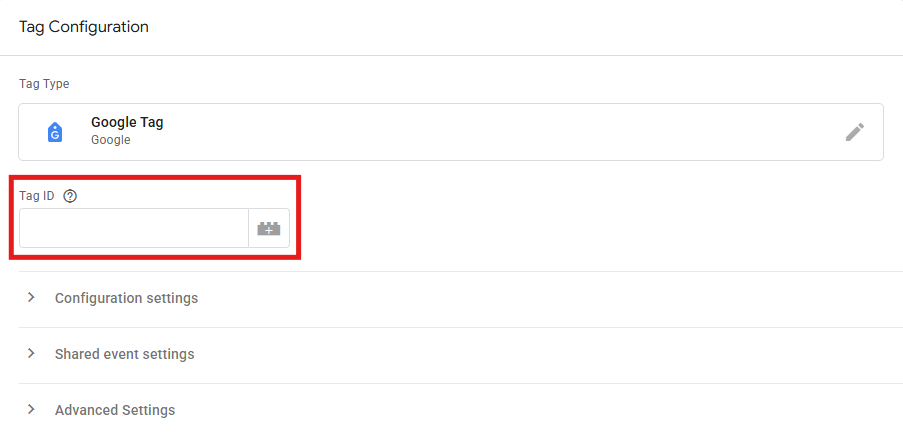
- Enter your Tag ID (for GA4 this is the Measurement ID, which looks like G-XXXXXXXXXX). You can find it in GA4 under Admin > Data collection and modification > Data Streams.
-
Under Triggering:
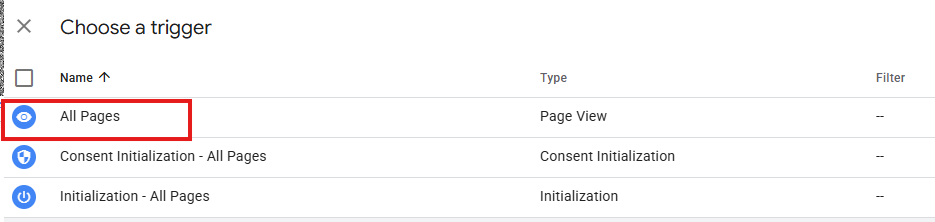
- Choose All Pages so the Google Tag fires on every page of your site.
-
Click Save to finish.
4) Add an event tag (optional, but recommended)
After the Google Tag is set up, you’ll usually want to track specific events. Event tags let you track the interactions that really matter, like clicks on a purchase button. Here’s a quick example:
-
Go to Tags > New.
-
Name the tag (e.g.: GA4 – Button Click).
-
Tag Configuration:
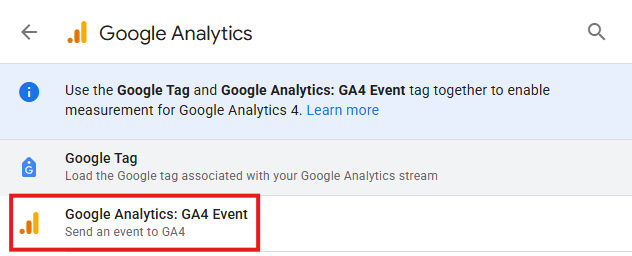
- Choose Google Analytics: GA4 Event.
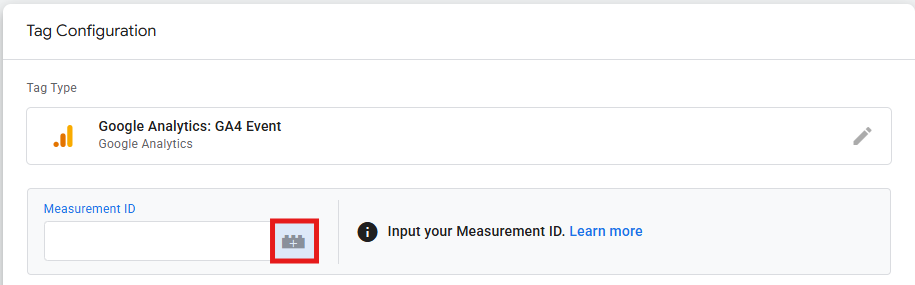
- In the Measurement ID field, instead of typing the ID directly, click the icon on the right (looks like building blocks). Select the Google Tag (which you created in step 3) from the dropdown list.
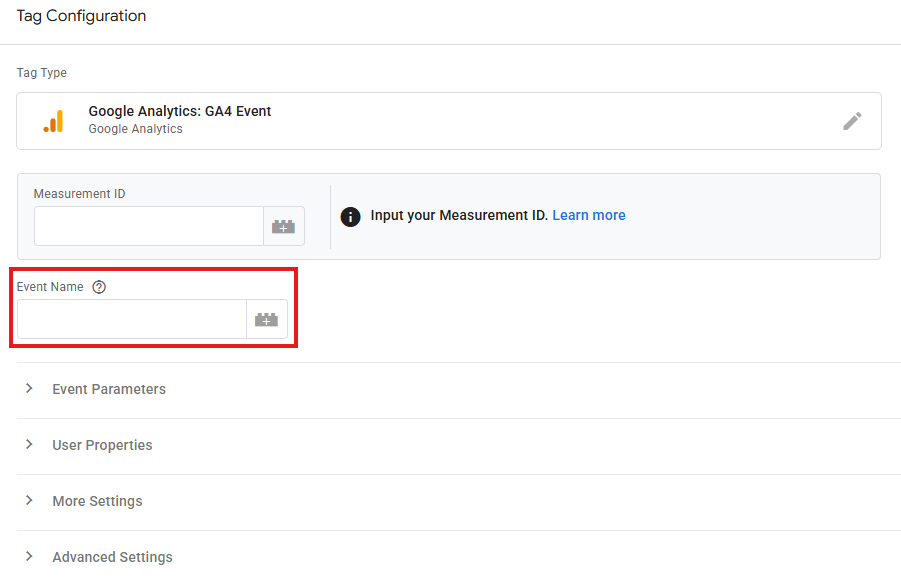
- Add an Event Name (e.g.: button_click).

-
Triggering:
- Click the + button (on the right-hand side) to create a new trigger.
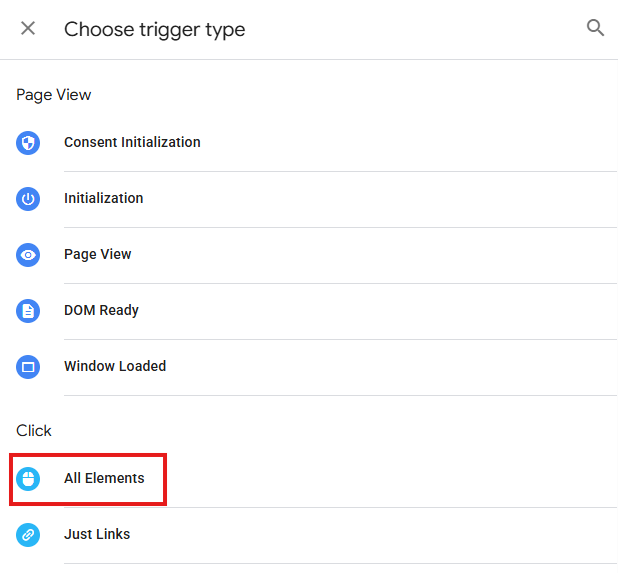
- Create a trigger of type Click – All Elements.
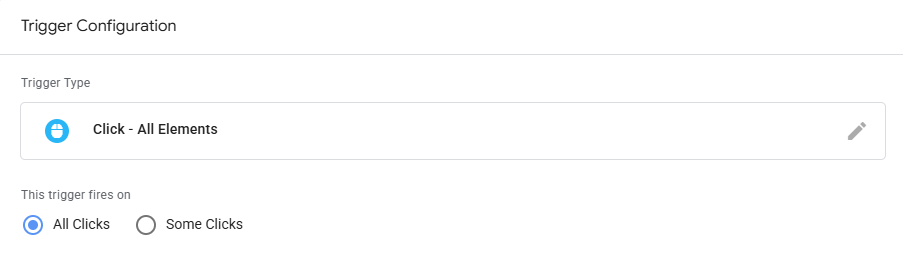
- Refine it so it only fires on the button you want.
-
Save the tag and test it in Preview mode.
5) Enrich your tags with variables (optional, but recommended)
You can add extra details to your tags using variables. This step is optional, but it shows how tags, triggers, and variables work together. Here’s an example using a GA4 Event tag:
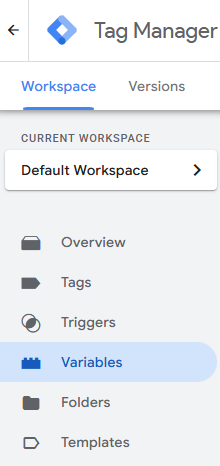
- In GTM, go to Variables.
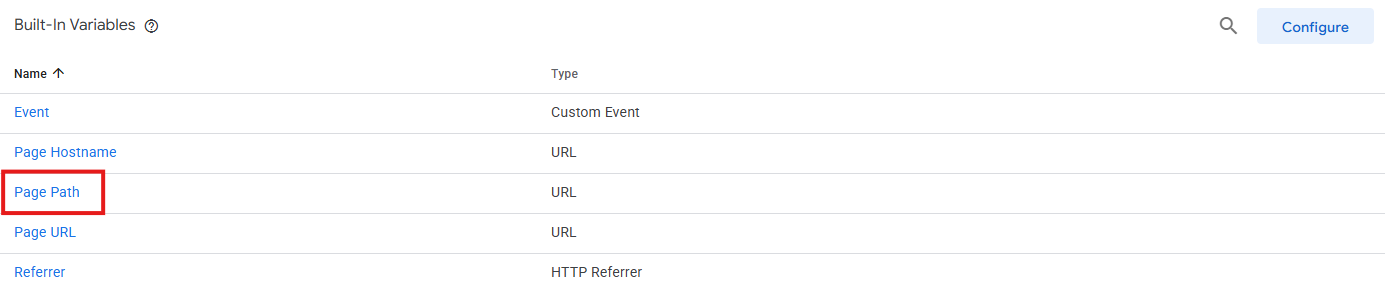
- In the Built-In Variables list, make sure Page Path (and others like Click Text or Click URL, depending on your needs) is enabled.
-
Now go to Tags and open your GA4 Event tag.
-
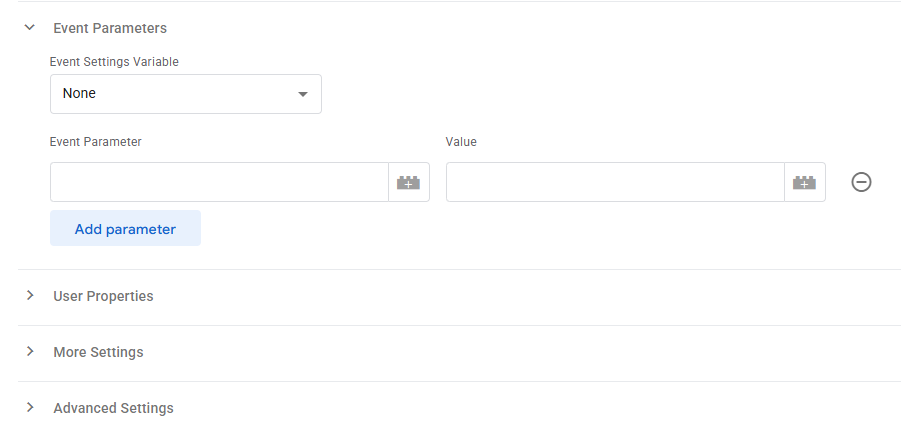
Expand the Tag Configuration section, scroll down to Event Parameters and click on Add parameter:
- Event Parameter: page_path
- Value: {{Page Path}}

-
Save your changes.
6) Verify and publish tags
Now that you’ve set up your tags, it’s time to make sure they’re working correctly before publishing:
- If you’re not already on GTM, go to https://tagmanager.google.com/ and make sure you’re signed in to your Google account.
- Open the container and, in the Workspace tab, click Preview.
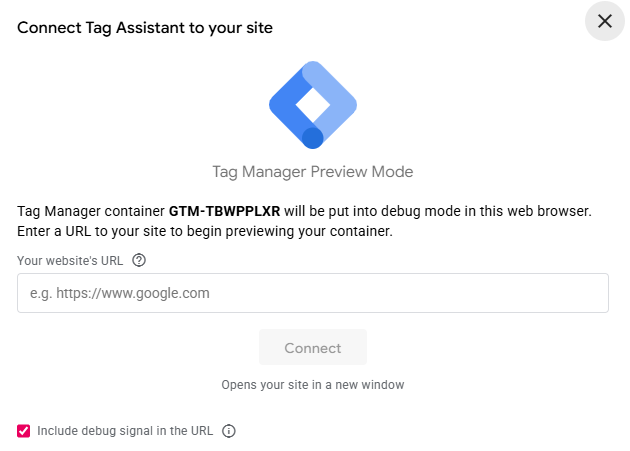
- Enter your website URL and click Connect.

-
Interact with your website (click buttons, submit forms, etc.) to see if your tags are firing correctly.
-
Use GA4’s DebugView (inside the GA4 interface: Admin > Data display > DebugView) to double-check that events are reaching Analytics.
-
Once everything looks good, return to GTM to publish the tags:
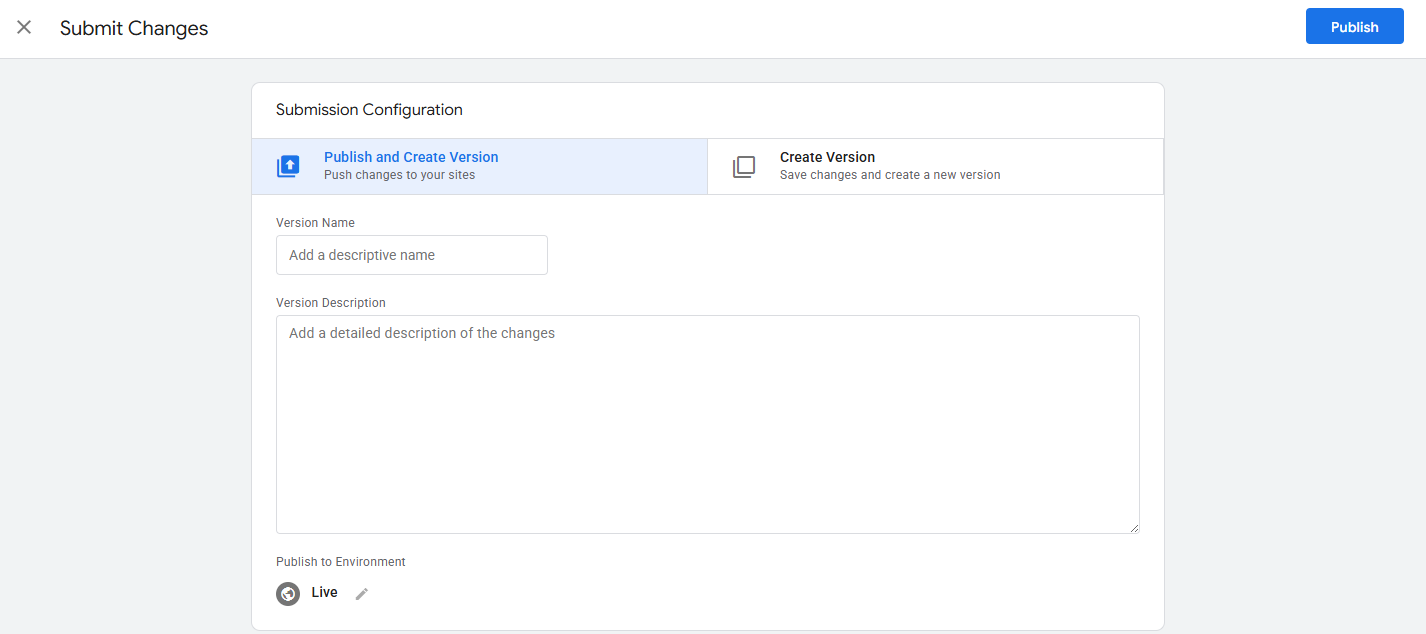
- In the Workspace tab, click Submit.
-
In the Submission Configuration panel:
- Select Publish and Create Version to publish the changes to your website. To save without publishing, select Create Version instead.
- Enter a name and description to document your changes.
-
Select Activity History to review the changes you’ve made.
-
In the end, click Publish.
Common mistakes to avoid when setting up GTM
Even if you’ve been careful with the previous steps, some issues can creep into your data. Here are common problems and how to avoid them:
-
Forgetting to remove old tracking code
Many websites already have hardcoded tracking scripts directly in the website code. If you add GTM and don’t remove those old tags, you’ll count events twice and make your conversion numbers too high.
How to avoid: check your website for any old code before installing GTM and remove anything that’s duplicated.
-
Not using naming conventions
A GTM container can quickly become chaotic if you name things “Tag 1”, “New Trigger”, or “Test Variable”. In a few months, you won’t remember what those are for.
How to avoid: create a simple naming system (e.g.: GA4 - Purchase Event; Trigger - Button Click - Contact Form; Variable - Page Path).
-
Skipping version notes when publishing
When you publish changes in GTM, you can give the version a name and a description. If you skip this, your team won’t know what you changed if something stops working.
How to avoid: always write a short description like “Added Google Tag” or “Updated purchase event trigger”.
-
Over-relying on “All Pages” triggers
It’s tempting to just fire everything on all pages, but this creates excessive noise in your reports. As an example, if a conversion tag fires on every page, your reports will have a lot of incorrect conversions, and you will quickly stop believing in your data.
How to avoid: be precise with your triggers. Use page paths, button IDs, or custom events to make sure tags only fire where they should.
-
Not testing on different devices and browsers
You might test GTM in your usual browser on your computer and find everything works perfectly, but then discover it’s broken on Safari or on a mobile phone.
How to avoid: run tests on different browsers and devices before publishing.
Final thoughts
Being comfortable with the basics of Google Tag Manager puts you in charge of your tracking. You won’t need to ask developers for every small change or update, you can manage tags yourself, ensure your data is accurate, and quickly respond to changes in your campaigns or website. That kind of adaptability is a big benefit for any marketing team.
To return to the kitchen analogy, once you understand the recipes (tags), when to cook them (triggers), and the ingredients they need (variables), you have complete control of your own kitchen. GTM provides the same level of confidence with your data. And once you’re sure of the basics, the more advanced stuff – custom events, server-side GTM, or connecting to BigQuery – won’t seem difficult. They’ll just be the obvious next steps. Plus, we have lots of articles to help you with those too.